Teaching Art is a feast into a of colour, line, texture, space and shape. By encouraging a visual exploration in my learning I love developing a creative approach to learning in the classroom. By encouraging different techniques and an understanding of art I hope to help students appreciate visual learning more. I hope you enjoy my uploads and can use them. Please contact me if you require any further information.
Teaching Art is a feast into a of colour, line, texture, space and shape. By encouraging a visual exploration in my learning I love developing a creative approach to learning in the classroom. By encouraging different techniques and an understanding of art I hope to help students appreciate visual learning more. I hope you enjoy my uploads and can use them. Please contact me if you require any further information.
Firstly consolidating watercolour skills in this project the powerpoint then goes to look at the artist called Hundertwasser. Looking in depth at Hundertwasser, developing an Artist Study presentation after going to the computer room to find information on this artist and to analyse one picture of his work.
Students are then asked to on four separate sheets to draw out the key symbols and elements in Hundertwasser’s work. .
Students are then given pictures of buildings and asked to continue to apply his style and to make some drawings inspired by his work.
Examples of all these are given with student examples.
This project then further developed into making a clay tile after formulating an orignal own interpretation of Hundertwasser. There are plenty of student examples for you to look at.
I have also added further extension tasks on Hundertwasser and some further interesting facts about his work.
OBJECTIVES
To develop an understanding of the work of Hundertwasser by studying the elements from Hundertwasser’s work.
To copy some of Hundertwasser’s symbols with your pencil.
To draw out Hundertwasser’s Onion domes, Lollipop trees, Faces and Spirals.
To draw out a large picture of Lollipop trees of Hundertwasser and to use colour on this
To use pictures of buildings and then to imaginatively interpret one’s own version of Hundertwasser using the research ideas completed into his use of symbols
Students make up their own design of Hundertwasser in pencil and then in colour.
To make a clay tile based on the design steps above- examples of student outcomes are given.
Task 1 ‘Key Elements in the Art of Hundertwasser’
Copy out the picture given on slide 3 and label the key elements Hundertwasser uses in his work. You may use any materials you have to do this. It can be in colour or black and white with your pencil. Do this carefully.
Attached are three powerpoints for developing a KS3 Collage in Fabric on the 12 Days of Xmas and the artist Aminah Robinson.
Students use the ‘resources’ powerpoint to draw ideas to make up their own design for the 12 days of Xmas.
Class divided and each child gets a different day to design.
I used Black velvet fabric as my backing fabric and each time the student did their drawing I traced this onto different coloured fabric shapes and students then cut this out and pritt sticked this onto the black velvet fabric.
see powerpoint of song '12 days of xmas ’ for resources
see powerpoint Artist interpretation and learning about different fabric artists.
see powerpoint on stitchung techniques
Thirdly, students then cut their designs out in fabric - I used transfer receipt like paper so students could trace onto the fabric and then cut out.
Finally students then embellish their fabric with different stitches and I have a powerpoint with video links on how to do the different stitches: running stitch, blanket stitch, satin stitch, chain stitch and daisy stitch…
A support for teaching GCSE art
A number of powerpoints on individual artists to use as part of Developing ideas for Assessment Objective One.
Learning skills in Art
Acrylic painting with card - Viera Da silva
painting layers and using Gold - Victoria Crowe
Photocopy drawing with Chila Burman
Klimt patterns
Transfer medium with Robert Rauschenberg
Tim Burton drawings and fantasy art
Printing with Angie Mitchell relief prints
Figure drawing and simplification using Henry Moore
City street painting with Lowry
Peter Blake graphic CD cover
Photography of Cindy Sherman
All of these tasks will build skills for GCSE final project
Starting in year 9 and year 10 begire students choose own topic to develop
This tasks help to assess abilities and specific skills in Art. This helps to establish a Baseline Assessment for Art after having completed all these exercises. This should take 10-12 lessons. Please work through each exercise carefully.
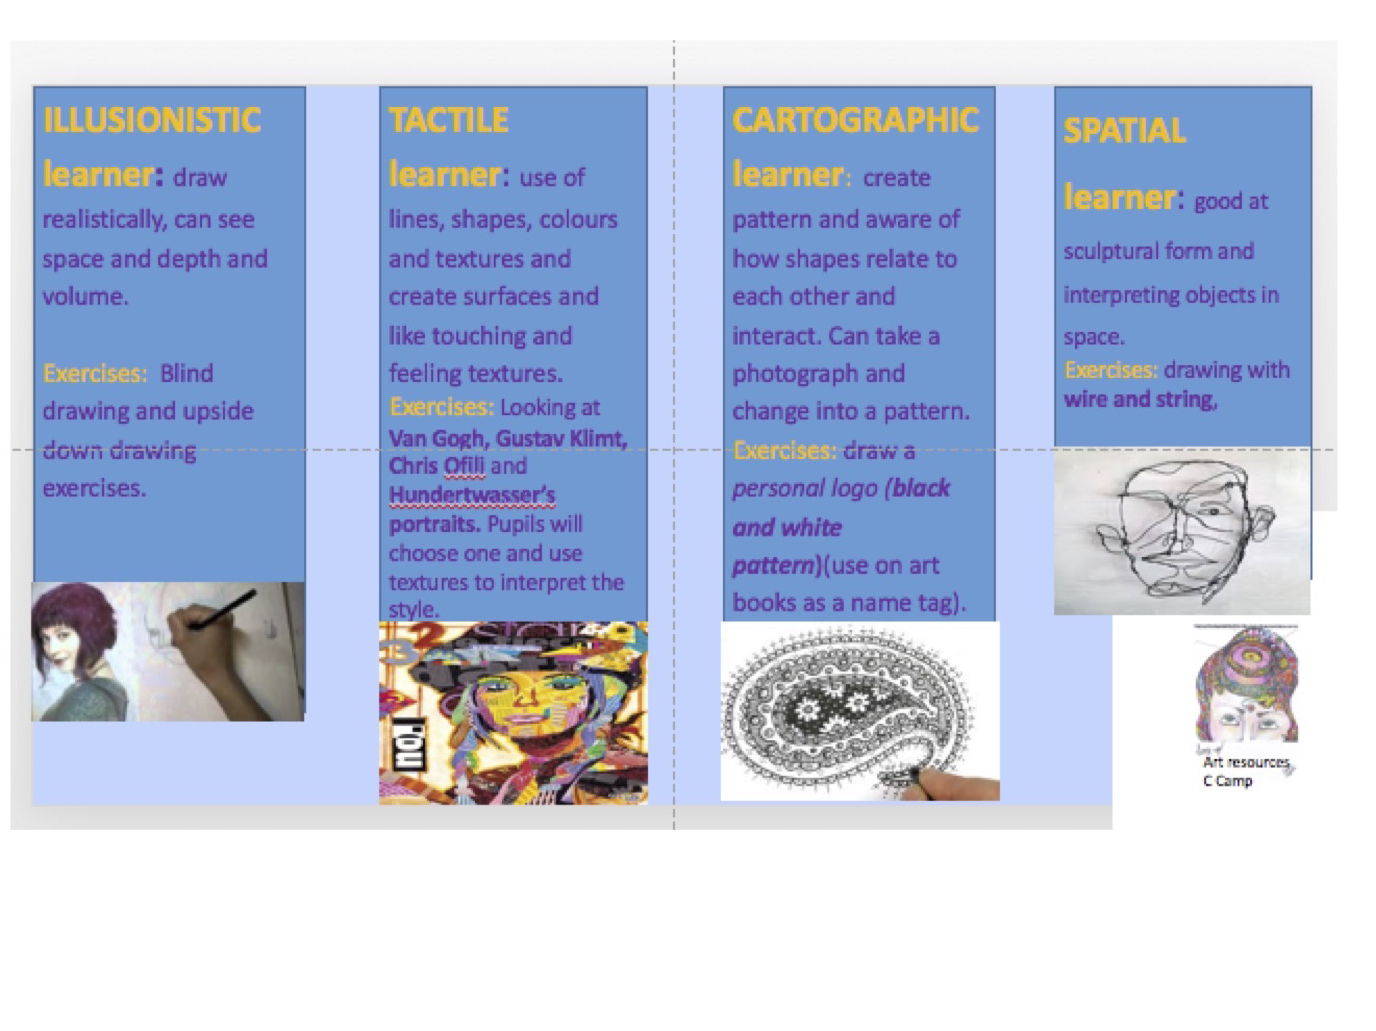
The aim of this diagnostic assessment is to look at specific skills used in art.
This diagnostic study is to try to assess different skills in Art. The tasks given are for the different learning/skills in art and it allows the pupils to explore these. There are tasks given for each area of learning.
Areas of learning with task:
ILLUSIONISTIC learner: draw illusionistically, blind drawing and upside down drawing exercises.
CARTOGRAPHIC learner: draw a personal logo (black and white pattern)(use on art books as a name tag).
TACTILE learner: Looking at Van Gogh, Gustav Klimt, Chris Ofili and Hundertwasser’ portrait works, their use of lines, shapes, colours and textures. Pupils will choose one of these artists to develop in a tactile way using re-cycled materials.
SPATIAL learner: drawing with wire and string, assess whether good at sculptural form.
Furthermore, assess the students ability to write ANALYTICALLY and to critically analyse a painting… The pupils will also need to self assess and evaluate their outcomes.
At the end of this exercise we would be able to assess pupils strengths and weaknesses in art at KS 3 and there are many opportunities in the presentation for evaluation.
How to create an illusionistic space and to draw from first hand observation using blind drawing skills, contour line drawing, upside-down drawing and mark-making.
Focus on how to shade using dark and light tones with pencil and biro pens and focus on mark-making.
3 a To critically analyse other artist’s styles and techniques and select and question critically, making reasoned choices when developing work from observation.
3 b. Explore tactile qualities and select a range of materials to interpret a style of an artist. Develop a portrait using tactile materials.
Investigate how to express ideas using design skills and design processes and the formal elements like line, colour and flat shapes with patterns
Exploring drawing with a 3D structure and looking at shape and line with construction of wire developing spatial recognition.
Analysing an artwork and investigating the formal elements used in an artwork.
Reflect on and evaluate one’s own and others’ work, adapting and refining the outcomes.
Presentation should also be assessed at the end of these exercises. Students should also always write a heading and the lesson objective clearly at the top of each page. There are clear evaluation sheets and assessment opportunities in the unit of work.
All tasks are presented with Lesson Objective and clear practical tasks.
This is a unit of work for the first 12 weeks at school.
There are questions to assess the students knowledge of Art from KS2 and then a project to assess he strengths and skills of the students. This is a diagnostic project looking at the Illusionary, Spatial, Tactile, Cartographic skills of the students with tasks to do.
There is also a fun project on making a sketchbook and giving prompts to help students to be creative in the Keri Smith powerpoint.
These are important skills for Key Stage 3
There powerpoints aim to develop the following skills below and in so doing develop confidence in drawing
Line exercises with blind, contour, gestural drawing skills
Upside down drawing -how to copy
Sphere drawing - teaching tonal drawing
Drawing to create an impact with pattern and different techniques - feather drawing
Portrait drawing - looking at proportions in a face drawing
Fun- confident line combining a photo in drawing
This is a project for A-level students starting with looking at Geometric Abstraction and the use of the colour ‘White’ in the work of modern abstract artists. This will help students to develop their own personal theme. This is a good starting theme for A-level students or IB students and gives them a process or idea to start with in order to develop their own personal outcome. It gives some examples to prompt the students to start thinking of: What is Abstraction, Conceptual Art, Cubism Abstraction and Geometric Art?
Students are asked to research various artists who show Geometric abstraction and ‘white’ from the Islamic artists to Kasimer Malevich (Suprematism), Wassily Kandinsky and Piet Mondrian.
The project continues giving the A-level students some practical tasks to develop the idea of how to paint a ‘white’ object.
There are also examples of some contemporary artists who use geometric abstract shapes and abstraction in nature.
Students should be asked to find their own artists they like who use Geometric abstraction and white.
Students then explore artists who have used white and look at how they use white in a textural way. Students can look at Robert Rauschenberg. Ben Nicholson and Barbara Hepworth.
Students choose one artist and make a booklet exploring their analysis of the artists and the way they use white, but also an experimental booklet showing how to show ‘white’ textual surfaces.
Students also take photographs of objects which are ‘white’ to develop further using different media and then subsequently to develop their own final piece based on their own personal research into the subject ’ white’ and ‘geometric abstraction’.
Examples of student’s work is given to help students explore various media to develop their own personal ‘white’ outcome.
There are also examples of final pieces of A-level students who tried to paint something white showing how they used pastel colours in their finals to develop their outcomes.
A detailed set of slides showing the basic elements of art used in Art. Exploring what is a point, line and shape and giving colour theory. This is a supportive project for a Foundation course, Year 12 students to develop a deeper understanding of the principles and elements of Art.
Students make a cupcake in each of the modern movement styles and make a cake stand at the end of the project. This is a set of powerpoints for each movern movement, Surrealism, Cubism, Expressionism, Neo-impressionism, Fauvism and Realism. It is a set of 8 lessons and then there is the Scheme of Work for the project.
For each of the movements students learn a different technique:
Surrealism- Splash Chance watercolour imaginary creature out of this to add to cupcake.
Cubism - geometrical shapes to shade light to dark to create angular cupcake over a collage made of newspaper. Realism - Tonal realistic shading to capture 3D form.
Expressionism-Black and white polyprint to capture the agitated marks of artists. Neo-Impressionism - using a stippling technique with paintbrush to capture fine mark-making.
Fauvism- random use of arbitrary colour to capture the bright spontaneity of paint marks.
At the end of the project students then choose a party theme and independently decorate their party plate with the cupcakes on this.
These tasks relate to understanding the key building bricks in Art: Elements of Art and the principles of design and should give you 12 weeks of tasks for students to make two booklets.
Making a booklet on the elements of art and then one on the principles of design.
Understanding these key terms helps in enabling students to write about art and if this is completed at Key Stage 3 can be a real help at GCSE and A-level
The song In A Gadda Da Vida inspired an exhibition of work at the Tate Gallery. This powerpoint just highlights the work at the gallery and gives examples of the Garden of Eden by different artists. There is also a link to a You Tube clip of the original song.
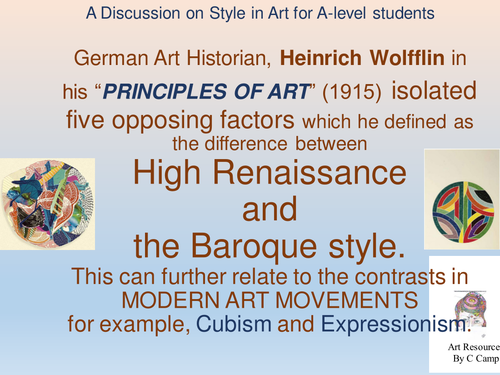
German Art Historian, Heinrich Wolfflin in his “PRINCIPLES OF ART” (1915) isolated five opposing factors which he defined as the difference between
High Renaissance and the Baroque style. This can further relate to the contrasts in MODERN ART MOVEMENTS
There are the 5 main ways of interpreting forms with examples of the work of Heinrich Wolfflin that is:
1. painterly, linear,
2. closed, open,
3. planes and recession,
4. multiplicity, unity,
5. clearness and unclearness.
Wolfflin supports a theory on ways of analysing a painting and examples of style which he formulated between the Renaissance and Baroque style and this gives a good interpretation of the differences in ways of depicting a subject.
In the slide presentation examples are chosen to show the differences in style and hopefully students begin to understand the terminology used and begin to look at the ways different works are composed.
The styles of Wolfflin also link to modern art movements like for example, painterly characterizes the work of Pierre Bonnard, Francis Bacon, Paul Gauguin, Vincent Van Gogh, Rembrandt or Renoir.
Linear characterizes the work of Vermeer or Ingres.
The Impressionists and the Abstract Expressionists tended strongly to be "painterly”, while movements such as Pop Art or photo-realism emphasize flatness and could be referred to more as linear.
This also helps A-level students find their particular strengths and to make them reflect on what particular style they enjoy doing in their own work and gives them an excellent sense of vocabulary to use when analysing artworks and gives them an understanding of using art vocabulary when critically analysing their own and artist’s work.
Students after reviewing the following slides on Wolfflin’s theory and discussing what the differences are in style begin to formulate their own essay on style using 2 artworks of your choice.
TASK: Write an essay on two different artworks and analyse the composition and structure of the artwork in relation to the theories of style of Wolfflin. Begin to not only discuss the visual appearance of the subjects but try to relate this to the influences and background of the particular artists you choose.
This is a source to show students various art styles and examples of artists who do interesting portraits.
It starts with Frida Kahlo and then goes through all the important portrait artists like Rembrandt, Frans Hals, Van Gogh, Picasso and then takes through a number of other artists with interesting styles, Hundertwasser, Gary Hume, Chila Burman, Sonya Boyce, Leger, Picabia, Dali and much more.
To be used as presentation to introduce students to artists who paint portraits in different styles.
Could be printed out as laminated sheets for students to see different portraits.
A mandala drawing - showing basic steps - to build a patterned line drawing.
In this task the students are asked to draw 4 rings using any object they have at home to make the circular rings.
Students are then given clear instructions on how to break up the circle and are given examples of patterns to follow.
There is also a very good video clip which gives clear guidelines.
At the end of the making of the Mandala students are asked to do research into the Mandala and to find out what makes up a mandala. There are questions for students to answer.
This is a short project for students to take a photograph of a doodle they do and where they combine it with an object.
Students look at the artist Vincent Bal and there are video links to his Shadowology work.
Students are then asked to make up their own version of this by taking an object in their house and then turning this into a picture by combining this object with a doodle.
There are some short questions to answer on the work of Vincent Bal.
Students are to first of all look at the artist Gregg Segal and analyse his work and then take a photograph in the style of this artist.
There are two tasks to this project:
Task 1: Read the text and complete the questions on the artist Gregg Segal
Task 2 Make a photograph in the style of Gregg Segal
Steps for Success:
Make it original and interesting, your animal, dog, space and all the things that make you during quarantine. You do not have to show your face.
Develop an understanding of Gregg Segal and answer the questions.
This is part of the self-identity project. Students firstly do a mindmap questioning and finding out about their own personal identity.
Students then do a monoprint and then use cultural images to collage into their monoprint portrait.
Then after this there is an extension to this project where students use Chila Burman and draw out a large body and in a group collage into this using tattoo patterns and symbols.
The Learning Objectives for this task is:
To develop into monoprinting cultural symbols and patterns.
Brief study of Chila Burman and looking at her collage work.
Cultural awareness of our differences and create interesting patterns and textures and symbols of our culture.
Understanding of different styles
Looking at a brief understaning of Tattoo art.
Appreciation of own patterns and self-identity
Collaging: Photographs of everyday items, patterns, favourite clothes, pictures of household items, objects that show own culture and self-identity
This links to Modern movement project and has activities for starters and a list of activities to take place weekly.
It has a Glossary with it for the project.
it has an evaluation for project.
Also resources for students to understand the movements.
There is a separate bundle for the whole project- with all the schemes for each movement with starter activities.
But, the outcomes are successful and students enjoy learning about the art movements and making cup-cakes in the various art styles.
WEEKLY
1 Discuss Art themes
2 Realistic drawing of a cup-cake and shading skills in book
3 Pop Art – To make a 2D relief cup cake using paper cut shapes
4 To draw a cake/biscuit e using the Cubism Collage and capturing geometric shapes light to dark
5 Continuation of drawing of biscuit/cake but doing this in Paint now and capture bright colours- Fauvism
6 Expressionism Doing a polyprint of cup-cake drawing in print and rolling ink
7Doing a Neo-impressionist cake drawing
8 and 9 Surrealism outcome –adding magical creature to cake
Presentation of cupcake stands
Evaluation of project
The Powerpoint is a short set of 4 slides which gives the students 4 exercises to copy straight symbols and elements in the work of Hundertwasser. There are clear instructions for each task and printable slides for teachers to print off or merely to use on a screen in front and to copy onto A4 paper.
I have also attached the lesson plan - so there are clear instructions so students can even learn remotely.